U-Boot FIT image support
Introduction
U-Boot FIT image is a uImage format which can combine the Kernel zImage and Kernel dtbs. For more information, check the document in U-Boot source
uImage.FIT/howto.txt
This SAMA5D3X-EK FIT image can support rev.C mother board and different display modules (resist touch screen, PDA4 and PDA7). It will detect the mother board & display module type and load correct dtb file for Linux kernel.
This page is mainly about how to make a FIT image for SAMA5D3X-EK board.
Requirement
- v3.10-at91 or v3.18-at91 Linux kernel are needed
- v2014.07-at91 or v2015.01-at91 U-Boot are needed
Build FIT image for SAMA5D3X-EK
If no error happened, then
sama5d3xek.itb can be found in
arch/arm/boot/dts folder.
Flash the FIT image to NAND flash
Please erase the nand area (
0xc0000~0x800000) before you program it:
- using default U-Boot environment, so need to erase U-Boot environment in nandflash.
- FIT image also includes the dtb and Linux kernel, so need to erase dtb, kernel partitions.
Launch SAM-BA tools
- According to this section make sure that the chip can execute the SAM-BA Monitor.
- Start SAM-BA GUI application
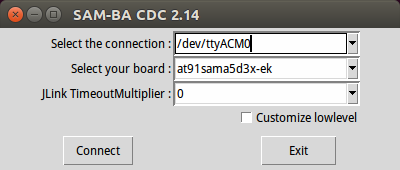
- Select the board: "at91sama5d3x-ek" in the drop-down menu and choose the USB connection.

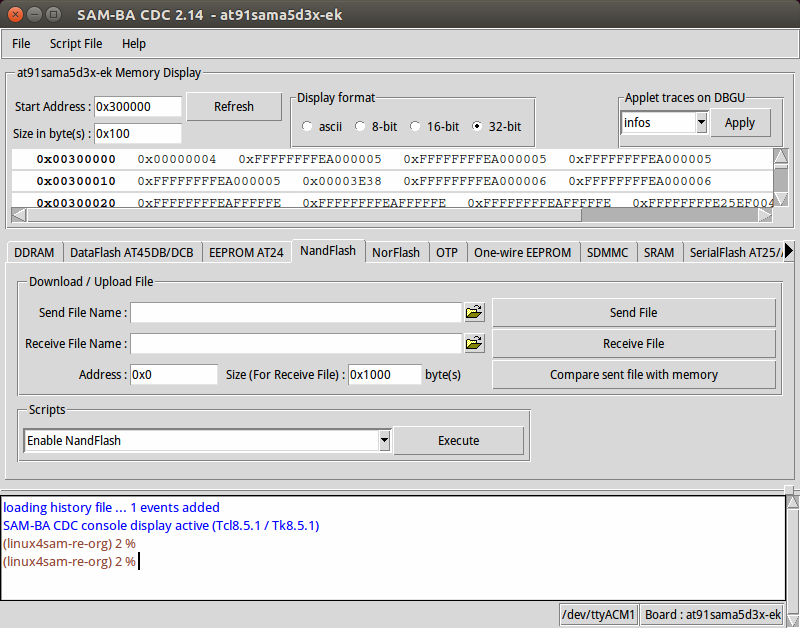
- Click the "Connect" button, the SAM-BA main window show up:

Using OS default PMECC parameters
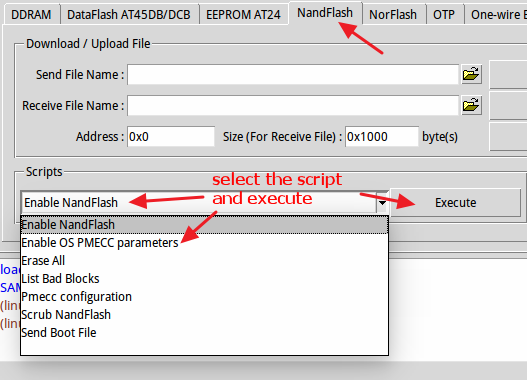
- Choose the NandFlash tab in the SAM-BA GUI interface
- Initialize the NandFlash by choosing the Enable NandFlash action in the Scripts rolling menu, then press Execute button
- Enable the PMECC by choosing the Enable OS PMECC parameters action, then press Execute button

Configure PMECC parameters (optional)
- To see the detail of PMECC parameters, you can choose the PMECC configuration action, then press Execute button.

- For SAMA5D3x-EK and SAMA5D3 Xplained board, since the default PMECC error correction bits is selected 4bits, so Number of ECC bits required should be selected to 4, and Ecc offset should be set to 36 in the below.

- Modify the Address to 0x40000
- Choose Send File Name open file dialog and select the U-Boot binary file and to program the binary to the NandFlash
- Click Send File button to program the binary to the NandFlash in address 0x40000.

- Modify the Address to 0x200000
- Choose Send File Name open file dialog and select the FIT image binary file:
sama5d3xek.itb and to program the binary to the NandFlash.
- Click Send File button to program the binary to the NandFlash in address 0x200000.

 , sama5d3xek_pda7.its
 and sama5d3xek.its
 under
under 


